I have been absolutely craving caramel corn lately. It's just such a perfect fall treat. I wanted to find the perfect recipe without using corn syrup because there is something that seems so wrong about that product. It is entirely too thick and sticky to be any good. I found this kick booty recipe from smittenkitchen. At first I didn't think I could taste the spiciness, but I think I am slightly immune to spice, being half-Thai and all, because it definitely has a nice kick. But it is still a sweet treat despite the spice. I added some candy corn to make it a lil' more festive.
Also, popping popcorn on the stove is dope. I mean DOPE. I was pretty intimidated by the thought of getting perfectly popped popcorn on the stove because I always seem to burn it, but it is really not that difficult. The key is to keep moving the pot so that the popcorn doesn't stick to the bottom and burn!
Recipe:
Slightly adapted from Smittenkitchen
Makes 4 quarts
Ingredients:
-Nonstick cooking spray or vegetable oil
-3 tablespoons vegetable oil
-1/2 cup popcorn kernels
-2 cups salted peanuts (optional)
-1 1/2 teaspoons baking soda
-1/4 to 3/4 teaspoon cayenne pepper (see Note)
-3 cups sugar
-3 tablespoons unsalted butter
-1 to 1 1/2 tablespoons kosher or coarse sea salt (see Note)
Lightly coat two large, heatproof rubber spatulas, a very large mixing bowl and two large baking sheets with nonstick cooking spray or a thin slick of oil.
To make the popcorn: In a large saucepan or pot with a lid, heat the oil over medium-high heat. Add two or three popcorn kernels and top with the lid. After they have popped, quickly remove them and add the 1/2 cup of popcorn kernels taking the pot off of the burner still covered to allow the kernels to heat up to the same temperature. After a minute, place the pot back on the burner, still covered and keep the saucepan moving until all of the kernels have popped, about 5 minutes. I take a dish towel to grab onto the lid and handles and hold over the burner shaking the pot like a mad woman. Transfer to the prepared bowl, removing any un-popped kernels. Toss with salted peanuts, if using.
In a small bowl, whisk together the baking soda and cayenne pepper.
Have the two large baking sheets ready. In a medium saucepan, combine the sugar, butter, salt and 1/2 cup water. Cook over high heat, without stirring, until the mixture becomes a light golden-yellow caramel, 10 to 14 minutes. Remove from the heat and carefully whisk in the baking-soda mixture (the mixture will bubble up).
Immediately pour the caramel mixture over the popcorn. Working quickly and carefully, use the prepared spatulas to toss the caramel and popcorn together, as if you were tossing a salad, until the popcorn is well coated. I quickly added the candy corns at this point and stirred em in.
Spread the popcorn onto the baking sheets and quickly separate them into small pieces while still warm. Cool to room temperature, about 15 minutes. Once cool, store in an airtight container for up to two week.
Pages
Two Bit, you say?
We are just two girls; living in a two-bit town; using this blog to make a name for ourselves in this world.
Showing posts sorted by date for query caramel. Sort by relevance Show all posts
Tuesday, November 8, 2011
Wednesday, May 4, 2011
Tops Places to Study in Lexington
Finals week in Lexington is season of studying. This is when you try to drink enough coffee in hopes that you can understand all that has been thrown at you for the past 4 months. 2Bit, as a master studier, has compiled a studyer's guide to Lexington. Enjoy and show those finals who's boss! (it's YOU!!).
And keep in mind the star ratings are only based on study value alone.
1. Coffee Times: 5 stars *****
And keep in mind the star ratings are only based on study value alone.
1. Coffee Times: 5 stars *****
-LOCATION: Moore Dr and Regency Road.
![]() |
| We live together, we study together. I can't get away from them! |
-CONS: It is not very big with only so many places to sit. However, what coffee shop doesn't have this problem? And I have only had an issue with it on a rainy Saturday afternoon when everyone's wanting to get some coffee. Also, a huge con for me is that you CAN'T bring in outside food. You must eat their food, which looks good but I am not a fan of cold sandwiches. They do have some yummy quiche though. Your clothes will smell like coffee for days.
-DRINK OF CHOICE: Iced Latte with skim milk and sugar free coconut and white choc syrup- oh baby yummy! Also a fan of the Moka Lite ice blended drink, even though I am pretty sure they make it from a powder- yuck but yum!
![]() |
| They are going to do so well on their finals. I can just tell! |
2. Euclid Starbucks: 3.5 stars ***.5 (? how to do a half star)
-LOCATION: High Street
-PROS: Recently (somewhat) free wifi! Outlets at pretty much every seat. You can look up the drink calories online. They have tasty food. AND you can bring in your own food if you want. I don't think they encourage this, but I saw some girls bring in some outside food and they didn't seem to care. I particularly like the hot sandwiches. There are also a lot of drink options. Can be a decent place to study. You are bound to overhear a meeting between a future bride and her wedding planner (yes, this IS a pro).
-CONS: Obviously the price. I slightly feel like I am participating in a voluntary robbery when I buy a drink from here, yet I continue to do it...
![]() |
| She had no idea... |
It can be very noisy at times. It seems to be an international meeting place since there are representatives from all over the world having very loud conversations. If you are lucky, when you study, you may get to experience the coughing Eastern European woman (? that's a complete guess) who comes and coughs on the couches. I don't know what she does, and she seems to have a great heart, but she will cough somethin' furious that will distract from your studies. In addition, if you want to get business advice or buy something from a businessman, you have come to the right place since this seems to be where everyone comes to "work?" All I know is you will see tons of men in business suits.
I guess that could be a pros depending on your perspective. If you want to do some leisurely reading and people watch, you've come to the right place. Or if you want to be assaulted by some creepy old man, oh, you have found your home.
Also, this Starbucks lacks a lot of syrups and options that others do. No sugar free mocha, to Margaret's dismay. And no light mint chocolate chip frappucino to mine.
-DRINK OF CHOICE- skinny cinnamon dolce latte, skinny iced vanilla latte, skinny mint choco chip frappucino, Joy tea, of course!
3. Regency Panera: 3 stars ***
-LOCATION: In the Regency Center off of Nicholasville Rd
![]() |
| Oh how studious! |
-PROS: Free WIFI! They have delicious food. There are a lot of seating options. You can look at cookies. The ambiance is like a French bakery. You can see a lot of happy people who are not studying, which can brighten up your studying experience.
-CONS: There are very few seating options with access to outlets. It can be very noisy because of all of those joyful folks who aren't studying. They close early.
-DRINK OF CHOICE: Are you crazy? You don't drink, you eat at Panera. I am addicted to the new Thai Chopped Chicken Salad. Cara Bit would totally make some Asian reference here, but it is SOOO good. Oh baby I could eat it for every meal. If you do get thirsty, the iced green tea is really good and not very caloric!
4. Common Grounds: 3 stars ***
-LOCATION: High Street
-PROS: Plenty of seating options- it is huge! Also a lot of food and drink options. I mean, a lot. Not sure about the low cal options though. Very artsy cool hipster feel, if that's what you're into, which I totally am. You will feel like you belong since there tend to be a lot of people here "studying" (talking but at least they have there books and so look like studying). They also have comfy couches. It makes studying fun, if you can actually study.
| So many choices.. what to do, Bit? |
| You can study or look at 2Bit. If you're cool, you will be looking at 2Bit. |
5. Good Foods: 2.5 stars **.5
-LOCATION: Southland Drive.
-PROS: Some of the best food you will find in Lexington. Plenty of seating. Delicious smoothies and desserts. Free Wifi. They remodeled around a year ago, and it looks great. You can take a break from studying and shop in the store. The bulk aisle has become a favorite. Well-lit room.
-CONS: It is extremely noisy and distracting to study as you are compelled to look at all of the hippies or eavesdrop on random conversations. Access to outlets is limited.
-DRINK OF CHOICE: The Mochaccino is good, but the money spot is the hot buffet or sushi. Yum yum! You just can't go wrong with good foods.
A few places that I haven't been to lately are Willy T or Coffea, but are there any other study hot spots that you know of and love? 2Bit Joy just finished law school but will need some places when she studies for the bar. So, help a Bit out. xoxox
Monday, January 24, 2011
Caramel Apple Cheesecake
Oh baby baby. All of you 2bits are in for a treat today! If you want a taste of heaven, well first you need to accept Jesus as your savior, but if you want a taste of heaven while here on earth, still accept Jesus as your savior and then make this cheesecake! Mmm mmmm.
2Bit had a VIP's birthday to celebrate, her super amazing sister and favorite person in the world, Bonnie. Bonnie requested cheesecake as her birthday cake, and 2bit went to work looking for the best cheesecake money could buy- not really it just sounded good. I was a little bit nervous because I have never made a cheesecake before, which is pretty ridonculous because it has been my favorite form of dessert since I was a wee one. But mama 2bit makes a delicious cheesecake; so there was never a need for me to dabble in the fine art of cheesecake making. Any hoo... as I scoured the internet to find an appealing recipe, I saw the beautiful words- caramel, apple, cheesecake. I was sold.. Mmm mmm mmm. I can't emphasize the mmmm enough.
My main problem with this cheesecake is all of the butter, in total around 1 1/2 sticks. I tried to decrease where possible, but my rule for birthday cakes is that I would rather it taste good than experiment with the fat content because when it comes down to it, you need the fatty stuff to make it taste good. BUT next time I will definitely skimp a little more to see what I can get away with. I don't think you can skimp on the crust, but I did try to skimp any where else butter was called for. Next time friends, I skimp even more...
Adapted from Annie's Eats: http://www.stumbleupon.com/su/2tYgAA/annies-eats.com/2009/10/26/caramel-apple-cheescake-pie/
Next, make the apple filling (it takes a little time), melt the butter in a large skillet over medium heat. (You can skimp on the butter even more than I already have here if you so choose because the apples don't really need that much). Mix in the brown sugar, salt and cinnamon and cook for 1 minute, until bubbling. Mix in the apple slices and toss well to coat. Cook over medium to medium-high heat until tender and most of the liquid has been reduced, about 15-20 minutes. This will smell oooooh soooo yummy. Remove from the stove and let cool.
2Bit had a VIP's birthday to celebrate, her super amazing sister and favorite person in the world, Bonnie. Bonnie requested cheesecake as her birthday cake, and 2bit went to work looking for the best cheesecake money could buy- not really it just sounded good. I was a little bit nervous because I have never made a cheesecake before, which is pretty ridonculous because it has been my favorite form of dessert since I was a wee one. But mama 2bit makes a delicious cheesecake; so there was never a need for me to dabble in the fine art of cheesecake making. Any hoo... as I scoured the internet to find an appealing recipe, I saw the beautiful words- caramel, apple, cheesecake. I was sold.. Mmm mmm mmm. I can't emphasize the mmmm enough.
My main problem with this cheesecake is all of the butter, in total around 1 1/2 sticks. I tried to decrease where possible, but my rule for birthday cakes is that I would rather it taste good than experiment with the fat content because when it comes down to it, you need the fatty stuff to make it taste good. BUT next time I will definitely skimp a little more to see what I can get away with. I don't think you can skimp on the crust, but I did try to skimp any where else butter was called for. Next time friends, I skimp even more...
Adapted from Annie's Eats: http://www.stumbleupon.com/su/2tYgAA/annies-eats.com/2009/10/26/caramel-apple-cheescake-pie/
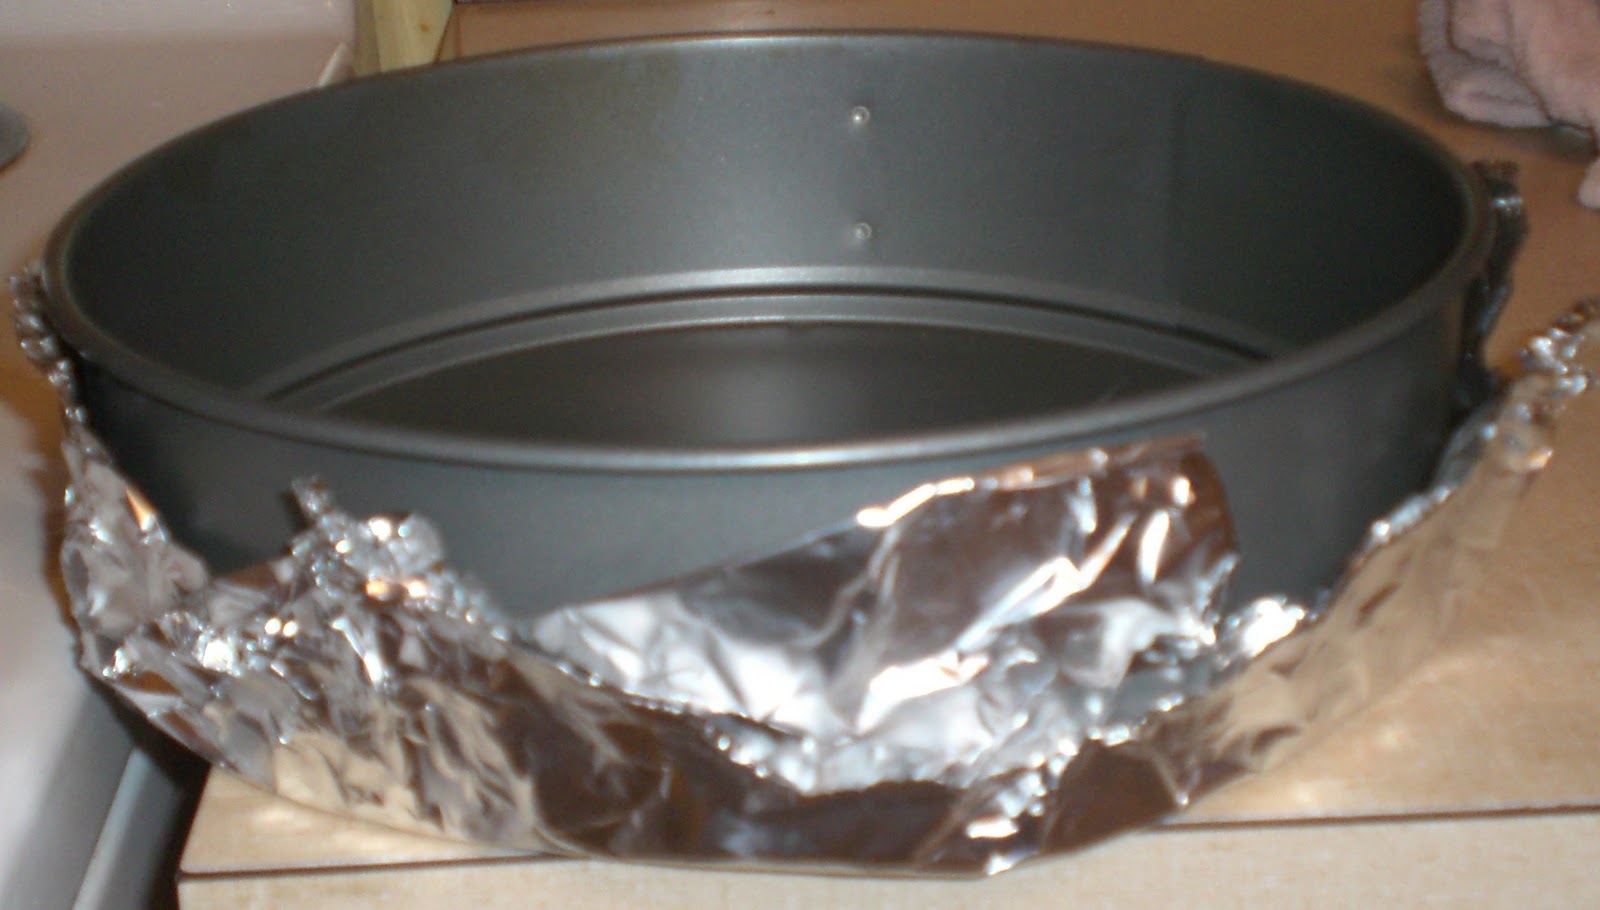
First, get a 9 inch springform pan and place doubled aluminum foil on the bottom. Don't be intimidated by its circular or springy nature, it is not difficult to use. The aluminum foil will keep any water from leaking into the pan when you bake the cake.
FOR THE CRUST:
1½ cups graham cracker crumbs (about 8.5 sheets o' grahams)2 ½ tbsp. sugar
½ tsp. cinnamon
5 1/3 tbsp. unsalted butter, melted
½ tsp. cinnamon
5 1/3 tbsp. unsalted butter, melted
½ cup chopped pecans (optional)
FOR THE CHEESECAKE FILLING:
3 8oz. cream cheese
3 8oz. cream cheese
~1 cup sugar
3 tsp. vanilla extract
3 large egg
3 tbsp. freshly squeezed lemon juice
3 tsp. vanilla extract
3 large egg
3 tbsp. freshly squeezed lemon juice
FOR THE APPLE FILLING:
3 tbsp. unsalted butter
½ cup light brown sugar, tightly packed
¼ tsp. salt
1 tsp. cinnamon
3 tbsp. unsalted butter
½ cup light brown sugar, tightly packed
¼ tsp. salt
1 tsp. cinnamon
1 tsp -1 tbl of almond milk
5-6 Granny Smith apples, peeled, cored and thinly sliced
FOR THE CARAMEL SAUCE:
½ c heavy whipping cream (next time will do ¼ heavy cream and ¼ almond milk)
½ c packed light brown sugar
4 tbl butter
Dash vanilla (1/2 – 1 tsp)
Light dash of salt (not even ¼ tsp)
½ tsp corn starch (optional)
Directions:
To make the crust, preheat the oven to 375° F. Grease the bottom and sides of the springform pan. Place the springform pan into a baking sheet with raised edges (you will be adding water to it later). In a medium mixing bowl, combine the graham cracker crumbs, sugar, cinnamon and melted butter. Toss with a fork until all the crumbs are moistened and the ingredients are evenly mixed. Transfer the mixture to the prepared springform pan and press the crumbs in an even layer over the pan bottom and as much as you can up the sides of the pan. Bake for 6-8 minutes, until golden in color. Let cool for about 10 minutes. Sprinkle evenly with the chopped pecans. Refrigerate the crust while you prepare the filling.
| Look at that delicious golden brown color.. |
| I put pecans on only 1/2 of the crust in case someone was allergic to nuts. However, I had no way of telling which side had the pecans on it and which side didn't; so luckily no one had allergies. |
Next, make the apple filling (it takes a little time), melt the butter in a large skillet over medium heat. (You can skimp on the butter even more than I already have here if you so choose because the apples don't really need that much). Mix in the brown sugar, salt and cinnamon and cook for 1 minute, until bubbling. Mix in the apple slices and toss well to coat. Cook over medium to medium-high heat until tender and most of the liquid has been reduced, about 15-20 minutes. This will smell oooooh soooo yummy. Remove from the stove and let cool.
| Waft your hands toward this picture and you can potentially smell the deliciousness. |
While the apples are cooking, let's make the cheesecake filling! Hoorah for cheesecake filling. It deserves many a hoorah, especially when it's smooth and creamy, like this one. Combine the cream cheese and sugar in the bowl of an electric mixer and beat on medium speed until smooth, about 1 minute. Mix in the vanilla, egg and lemon juice until well blended. Spread the cheesecake filling into an even layer over the top of the crust.
| The filling is so easy and a winner. It's exactly what you want in a cheesecake filling- creamy and thick. 2bit doesn't like when it's fluffy. Fluffy filling is baby's play, and 2bit is a woman :) |
Take the apple mixture and spoon evenly onto the top of the cream cheese mixture. Try to think of the apple mixture as a blanket and the cream cheese filling as a cold child, you want to cover the cold child up with the warm blanket! No white spaces,. 2bit knows you liked that creepy analogy.
| Oh look at that warm cheesecake child. |
Place a little bit of water into the baking sheet, enough to keep it moist while cooking. Cook in the oven at 350 for 15 minutes. After 15 minutes turn down the oven to 250 degrees and bake for another two and a half hours.
2Bit thinks it's time that you were all made aware of what 2Bit Joy has to work with when she cooks and what she means when she describes her oven as a fiery furnace (salted caramel cake).
| This is the inside, it looks kinda old school, right? |
| You would be incorrect, it IS VERY old school. Please ignore the mess atop the stove. |
| It's almost unfortunate that it's so sturdy. I can't say I haven't wished it would break so that we would be forced to get a new one. |
While the cheesecake is baking, it's time to make the caramel!! Combine the butter, heavy whipping cream, almond milk (if you don't have almond milk, just use whatever milk product you use because it will be much less fatty than whipping cream) and brown sugar in a saucepan. Stir together and add the vanilla and salt. Bring to a boil over medium to high heat. Once boiling turn to medium heat and keep low boil until it thickens, around 8 minutes. You can add the cornstarch if you fear it is not thickening enough. Once it cools, it will thicken; so don't be discouraged if at first it seems runny.Remove from burner and cool. Refrigerate until you are ready to pour over the cheesecake, which you should do the day of serving the cheesecake.
The cheesecake is done when the outer part is firm and the center is slightly soft. Take out of the oven and let it cool on a rack. Once cooled you can cover and refrigerate. Once cooled, pour cooled caramel on top. Serve with a smile and give to your beautiful sister.
![]() |
| We all thought it smelled pretty yummy. |
![]() |
| Bonnie kept trying to get us to smell the lid since "it smelled so good." I am pretty sure she was just smelling the cake. |
| Don't forget to make a wish, Bo Bo! Your wish comes true if you blow out all of the imaginary candles! |
| 2Bit Cara says booyah dance dance revolution. |
Friday, November 12, 2010
(Good Food's) Quinoa Stuffed Acorn Squash
Once upon a time, when 2Bit was formed, it was decided that we would indeed post our wonderful recipes, as well as the not so wonderful; in other words, our triumphs and failures as women. As easy as this recipe was, we preface this post by saying it falls closer under the "failure" category. Ok, not so much that it was a fail, but that it was rather bland, and frankly, a waste of our precious 2Bit time. Once you see the recipe, you will see why it came out bland, however any additional ingredients may save the day. Sad thing is, 2Bit wondered if it would be bland, but has such trust and hope in the most adored Good Foods, that we ignored our instincts.
- 1/4 cup quinoa cooked in 3/4 cup water until water is absorbed, about 15 minutes – Aisle 5 Bulk
- 1 medium acorn squash halved and seeded - Produce
- 1/4 cup walnuts, coarsely chopped – Aisle 5 Bulk
- 1/4 cup dried tart Montmorency cherries – Snack Aisle
- 1 Tbsp. of any of our locally produced honeys (look for the Kentucky Logo) – Aisle 2
- 1/8 tsp. ground cinnamon – Herb & Spice Aisle
- Spectrum Olive Oil spray – Aisle 3
***This recipe looks better, in 2Bit's opinion, since it calls for much more flava fav.
http://www.fitsugar.com/Healthy-Recipe-Quinoa-Stuffed-Acorn-Squash-6645730 | 2bit does love how the acorn squash pulls apart just like spaghetti squash. |
| The quinoa cooking... |
| Yep, that is the extent of the ingredients.. pretty LAME. In an effort to give it a boost, we added lemon juice and way more cinnamon, and that helped. |
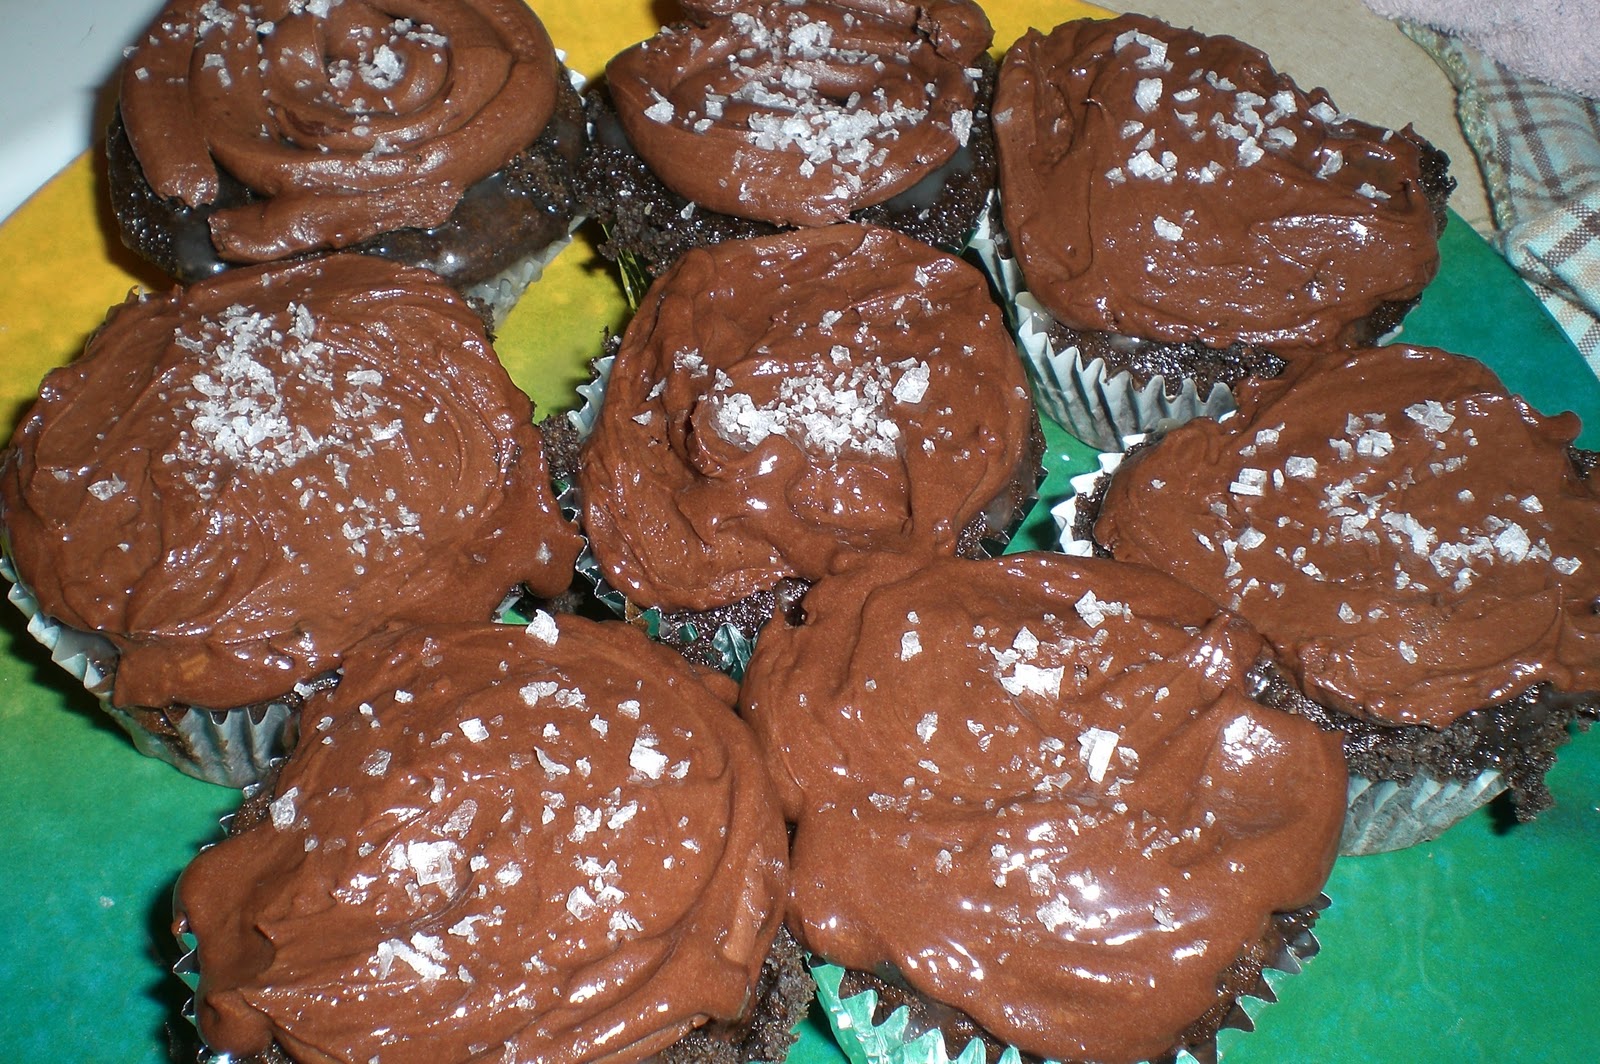
However.......2Bit licked our failure wounds by making a half recipe (8 cupcakes) of chocolate cake mix to go with the left over icing from the infamous Salted Caramel Cake.
**A special note, anytime you need smaller/different proportions for a recipe, allrecipes.com is a great website where you can specify the amount of servings and it alters it accordingly.
| See that beloved caramel to the left. That is what makes the cake, in 2Bit's opinion. |
| Ridiculously amazing. |
Monday, November 8, 2010
Salted Caramel Cake
*Disclaimer: Let me say this now; so that things are clear. This is the MOST INTENSE, TIME CONSUMING, FRUSTRATION-CAUSING CAKE that has EVER EXISTED... Is it worth it? Honestly, mine was not as good as the first one that I had, but still delish. But, let me also make it clear that this CAN be the THE MOST DELICIOUSLY RICH CAKE too ever pass your lips if done right, and friends, trust, many a cake have passed these lips.
*Also, this is going to be a ridiculously long post b/c 2Bit wished she had a post this long to help with all of the confusion in making this thang. Plus, 2Bit is kinda proud after completing this culinary feat.
*Also +1, this is a great cake for people on the new reverse diet where you try to gain weight. (you will love our bacon grease juice and sausage wrapped hashbrowns breakfast recipe).
This is a three layered chocolate cake with salted caramel, caramel-chocolate ganache icing, and fleur de sel in between each layer.. Can you see why it takes a long time?- I am talking pretty much a few hours of researching on the internet (but not for you, with the help of 2Bit!!) and a few trips to the grocery (mainly to find fleur de sel) and no joke, almost a half day of making everything.. 2Bit took on the challenge with trepidation, but in honor of her sweet Mom's birthday, decided to do it! (If anyone deserves it, it is this superwoman, even though she would have been happier with a Duncan Hines box mix, it's fine, it's fine)..
There are three different parts to make- the salted caramel, whipped caramel (chocolate) ganache icing, and the three-layer chocolate cake. I recommend making the salted caramel and icing the day (night in 2Bit's case) before you make and assemble the cake. There are so many steps and so many dishes that need to be washed that this already overwhelming process would break a person's spirit if they tried to do it all at once. According to 2Bit's research, the caramel will last up to 3 days. Not sure how long the icing will, but I would say it would be fine for 3 days as well. Freshness is always best, and if you are going to do it, do it right; so I would say don't chance old tasting ingredients and make them the day before.
Some additional notes about the salted caramel and whipped caramel ganache icing:
First, Take heart dear friends, you can do this! I had never made caramel before, and everyone that I had spoken to about making this cake said that they had to redo the caramel because it burned on their first try. I made the salted caramel and didn't have to redo it; so I thought I was in the clear and got a huge head as a result. To celebrate, I had a crazy night out on the town, tossing caramel in the air wherever I went, making everyone address me as Madame Caramel and dancing the caramelly night away... Pride comes before a fall, so, needless to say, I messed up the caramel for the icing the next morning. Seriously though, it is very stressful to make, but I will give you some tips so you don't do the same. And I do blame my mess ups on my oven range from the 1920s. It is sturdy but I am pretty sure it is what Nebuchadnezzar put Shadrach, Meshach and Abed-nego in (click here if you don't know what I am talking about fiery furnace).
- You do not need a candy thermometer. I did not use one. Just follow the instructions and take the boiling "pre-caramel mixture" (the water, sugar, and corn syrup) off as soon as it starts to turn a light brown color. It can burn very fast.
- Once the pre-caramel mixture starts boiling, you do not REALLY need to stir it the entire time. It wouldn't necessarily hurt, but you will be stirring for about 8-10 minutes worrying that it will never turn brown and you are doing something wrong.
- With that said, you should give it 5 minutes once it starts boiling and then as soon as it begins to change from clear to the hintiest bit of light brown, watch it like a hawk.
- Do not let the pre-caramel mixture sit too long before you pour the creme mixture into it. I may have done this. Wait absolutely no longer than a minute.
- You should refrigerate the icing before putting it on the cake to firm it up a bit.. If you make the caramel and icing beforehand, refrigerate but take out around an hour or so before frosting to let them get to room temp.
| Look at all of that fancy flaky goodness... |
(2Bit BTW: This morning I was listening to NPR, which I never do, and they had some salt specialist talking about all the different types of salts and their nuances... Salt is a serious thing.. So save up a month's salary, buy an ounce of the fancy stuff, and make this cake)
Third, you CAN de-fatten the icing. If you are like me, you saw the 4 sticks of butter and thought there had to be some sort of typo. Unfortunately, that is not the case; the recipe seriously does call for that much. None of my online research revealed any alternative or even thought about reducing the butter. But 2Bit, always revolutionizing the food world, likes to shake things up!! (and decrease the general fat intake). I just used 2 sticks of butter and some powdered sugar to thicken her up a bit.
These are all of the tips I can think of now, but let me know if you see anything that confuses you too much. It is a toughy, but let 2Bit tell you, if a girl who had never even used a kitchen aid mixer before can do it, SO TOO CAN YOU!!
My cake wasn't the same as far as moistness as the one that I had, but it was still delicious. So, take this advice with a grain of salt because I did not do it perfectly. But it was still pretty much amazing if you love salty and sweet and straight up super rich chocolatey goodness. Mine was slightly dry for some reason. I may have just baked the cake a little bit too long, but it was still rich and delicious. So here you go courageous bakers!
Salted Caramel Cake:
For the Classic Chocolate Cake Layers
3/4 cup cocoa powder (I used dark)
1-1/4 cups hot water
2/3 cup sour cream
2-2/3 cups all-purpose flour
2 teaspoons baking powder
1 teaspoon baking soda
1/2 teaspoon salt
3/4 cup (1-1/2 sticks) unsalted butter, softened
1/2 cup vegetable shortening (I just used regular, not vegetable)
1-1/2 cups granulated sugar
1 cup firmly packed dark brown sugar
3 large eggs, at room temperature
1 tablespoon pure vanilla extract
3/4 cup cocoa powder (I used dark)
1-1/4 cups hot water
2/3 cup sour cream
2-2/3 cups all-purpose flour
2 teaspoons baking powder
1 teaspoon baking soda
1/2 teaspoon salt
3/4 cup (1-1/2 sticks) unsalted butter, softened
1/2 cup vegetable shortening (I just used regular, not vegetable)
1-1/2 cups granulated sugar
1 cup firmly packed dark brown sugar
3 large eggs, at room temperature
1 tablespoon pure vanilla extract
Make the Classic Chocolate Cake Layers
1.) Preheat the oven to 325 degrees Fahrenheit.
2.) Butter three 8-inch round cake pans, line the bottoms with parchment paper, and butter the parchment. (PAM spray)
3.) Dust with flour, and knock out the excess flour.(2bit used cocoa powder)
4.) In a medium bowl, combine the cocoa powder, hot water, and sour cream and set aside to cool.
5.) Sift the flour, baking powder, baking soda, and salt together into a medium bowl and set aside.
6.) In the bowl of an electric mixer fitted with the paddle attachment, beat the butter and shortening on medium speed until ribbon-like, about 5 minutes.(I didn't really do 5 minutes)
7.) Add the sugars and beat until light and fluffy, about 5 minutes.(again, did not use 5 minutes)
8.) Add the eggs, one at a time, beating well after each addition, then add the vanilla and beat until incorporated.
9.) Scrape down the bowl and mix again for 30 seconds.
10.) Add the flour mixture, alternating with the cocoa mixture, in three additions, beginning and ending with the flour mixture.
11.) Divide the batter among the prepared pans and smooth the tops.
12.) Bake for 30 to 35 minutes, until a toothpick inserted in the center of each cake comes out clean.
13.) Transfer the cakes to a wire rack and let cool for 20 minutes.
14.) Invert the cakes onto the rack, remove the pans, and let cool completely.
15.) Remove the parchment.
For the Salted Caramel
1/2 cup heavy cream
1 teaspoon fleur de sel
1 cup sugar
2 tablespoons light corn syrup
1/4 cup sour cream
4.) In a medium bowl, combine the cocoa powder, hot water, and sour cream and set aside to cool.
| Give the ingredients a little bonding time before becoming permanently bonded. |
7.) Add the sugars and beat until light and fluffy, about 5 minutes.(again, did not use 5 minutes)
8.) Add the eggs, one at a time, beating well after each addition, then add the vanilla and beat until incorporated.
9.) Scrape down the bowl and mix again for 30 seconds.
10.) Add the flour mixture, alternating with the cocoa mixture, in three additions, beginning and ending with the flour mixture.
| It was the fluffiest batter. |
| You probably want to hang this artistic take on cake on your wall... 2Bit is tempted to do the same. |
12.) Bake for 30 to 35 minutes, until a toothpick inserted in the center of each cake comes out clean.
13.) Transfer the cakes to a wire rack and let cool for 20 minutes.
14.) Invert the cakes onto the rack, remove the pans, and let cool completely.
15.) Remove the parchment.
For the Salted Caramel
1/2 cup heavy cream
1 teaspoon fleur de sel
1 cup sugar
2 tablespoons light corn syrup
1/4 cup sour cream
Make the Salted Caramel
1.) Combine 1/4 cup water, sugar, and corn syrup in a medium saucepan; stir to combine. Bring to a boil over high heat. Cook until the mixture reaches 350 degrees on a candy thermometer, about 10 minutes.
2.) Meanwhile, in another small saucepan, mix together cream and salt. Bring cream to a boil and cook until salt has dissolved, 3 to 5 minutes. Remove from heat and set aside.
3.) When the caramel mixture has reached 350 degrees, remove from heat and allow to cool for 1 minute. Carefully add the hot cream to the caramel; stir to combine. Whisk in sour cream. Cool, and store in an airtight container, refrigerated, for up to 3 days until you are ready to assemble the cake.
For the Whipped Caramel Ganache Frosting
1 pound dark chocolate (60 to 70% cacao), chopped
1 & 1/2 cups heavy cream
1 cup sugar
2 tablespoons light corn syrup
2 cups (4 sticks) unsalted butter, soft but cool, cut into 1/2-inch pieces (I used 2 sticks + some confectioner's sugar)
1.) Combine 1/4 cup water, sugar, and corn syrup in a medium saucepan; stir to combine. Bring to a boil over high heat. Cook until the mixture reaches 350 degrees on a candy thermometer, about 10 minutes.
| As soon as it starts boiling, it will be clear like this. Give it a good 7-10 minutes... It WILL turn brown, don't worry |
| If you aren't using a candy thermometer take it off the burner as SOON as it starts to turn to a light brown color. |
| Pre-caramel mixture |
3.) When the caramel mixture has reached 350 degrees, remove from heat and allow to cool for 1 minute. Carefully add the hot cream to the caramel; stir to combine. Whisk in sour cream. Cool, and store in an airtight container, refrigerated, for up to 3 days until you are ready to assemble the cake.
| Do not let the pre-caramel mixture sit too long before mixing in the cream... Or else it will get hard and you will loose some of the caramel... |
| Look at all that caramely goodness I lost on this whisk. Hard as a rock or else I would have salvaged it somehow. |
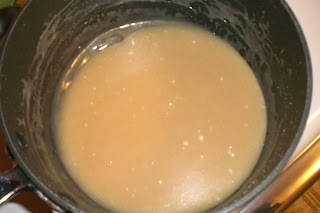
| Final salted caramel |
For the Whipped Caramel Ganache Frosting
1 pound dark chocolate (60 to 70% cacao), chopped
1 & 1/2 cups heavy cream
1 cup sugar
2 tablespoons light corn syrup
2 cups (4 sticks) unsalted butter, soft but cool, cut into 1/2-inch pieces (I used 2 sticks + some confectioner's sugar)
Make the Whipped Caramel Ganache Frosting
1.) Combine 1/4 cup water, sugar, and corn syrup in a medium saucepan; stir to combine. Bring to a boil over high heat. Cook until the mixture reaches 350 degrees on a candy thermometer, about 10 minutes.
2.) In another small saucepan add cream and bring to a boil. Remove from heat and set aside.
3.) When the caramel mixture has reached 350 degrees, remove from heat and allow to rest for 1 minute.
4.) Add the hot cream to the caramel; stir to combine. Let cool 4 minutes.
5.)Place chocolate in the bowl of an electric mixer and pour caramel sauce over chocolate. Let sit 1 minute before stirring from the center until chocolate is melted.
6.) Attach bowl to electric mixer fitted with the paddle attachment and mix on low until the bowl feels cool to the touch. Add butter (and confectioner's sugar to thicken it up if you decrease the butter content) and increase speed to medium-high until mixture is well combined, thickened, and slightly whipped, about 2 minutes.
7.) Cool the ganache for 20 minutes or so before frosting the cake for easier frosting.
Extra For Cake Assembly:
2 teaspoons fleur de sel, plus more for garnish
Assemble the Cake !!
1. Place one cake layer on a serving platter (or whatev nice looking plate you have)
2. Spread 1/4 cup of the caramel over the top.
3. Let the caramel soak into the cake, then spread 3/4 cup of the ganache frosting over the caramel.
4. Sprinkle 1 teaspoon of the fleur de sel over the frosting, then top with the second cake layer.
5. Repeat and spread with caramel, frosting and sprinkle with 1 teaspoon of the fleur de sel.
6. Then top with the third layer. Spread with caramel.
7. Crumb coat the cake (2Bit has no idea what this is and did not do it, but if you do and think its a good iea, more power to you sister or brother bits) and put the cake in the refrigerator for 15 minutes to firm up the frosting (tote did not do this).
8. Frost the sides and top with the remaining frosting.
AND......
Looky Lou, You are 2legit 2BIT!
This cake will keep beautifully in a cake saver at room temperature (cool and humidity free) for up to 3 days.
If your room is not cool, place the cake in a cake saver and refrigerate for up to 3 days.
Remove the cake from the refrigerator and let it sit at room temperature for at least 2 hours before serving.
1.) Combine 1/4 cup water, sugar, and corn syrup in a medium saucepan; stir to combine. Bring to a boil over high heat. Cook until the mixture reaches 350 degrees on a candy thermometer, about 10 minutes.
2.) In another small saucepan add cream and bring to a boil. Remove from heat and set aside.
3.) When the caramel mixture has reached 350 degrees, remove from heat and allow to rest for 1 minute.
4.) Add the hot cream to the caramel; stir to combine. Let cool 4 minutes.
| Final caramel product (this is the second one, after I burned the first on my old school range... I got to use a lovely modern stove while I babysat. Made such a difference) |
| Caramel... Chocolate.. Yumm. |
7.) Cool the ganache for 20 minutes or so before frosting the cake for easier frosting.
Extra For Cake Assembly:
2 teaspoons fleur de sel, plus more for garnish
Assemble the Cake !!
1. Place one cake layer on a serving platter (or whatev nice looking plate you have)
2. Spread 1/4 cup of the caramel over the top.
| I don't think this cake really has enough caramel b/c it gets overwhelmed by the rich choco.. I would even increase the amount of caramel, but I am a caramel-o-holic. |
4. Sprinkle 1 teaspoon of the fleur de sel over the frosting, then top with the second cake layer.
| I kinda tried to skimp as much as I could on the icing even though it doesn't look like it... I had probably over a cup of icing left over. |
| If you don't want too much salt, I saw some recipes that omitted this second layer of salt. But 2Bit didn't b/c it adds too much to this cake. |
7. Crumb coat the cake (2Bit has no idea what this is and did not do it, but if you do and think its a good iea, more power to you sister or brother bits) and put the cake in the refrigerator for 15 minutes to firm up the frosting (tote did not do this).
8. Frost the sides and top with the remaining frosting.
AND......
Looky Lou, You are 2legit 2BIT!
This cake will keep beautifully in a cake saver at room temperature (cool and humidity free) for up to 3 days.
If your room is not cool, place the cake in a cake saver and refrigerate for up to 3 days.
Remove the cake from the refrigerator and let it sit at room temperature for at least 2 hours before serving.
| See how the icing breaks apart so? Don't love that. Not at all. |
Subscribe to:
Posts (Atom)